To my friends: My work is done. Why wait?
Suicide note of
George Eastman (1854-1932)
The diversity of commercially
available photographic films is decreasing,
because of the lesser demand which results from the overwhelming success of digital
photography. Irreplaceable casualties include Kodak's HIE infrared film (2007)
and the epoch-making Kodachrome (2009). More recently,
Kodak stopped producing high-speed black-and-white films and Fuji discontinued
all but one of its B&W films.
On the bright side, Ilford and Agfa have kept their entire lineup intact
(albeit at a high price point in the case of the later)
and have announced they'll keep doing so.
The chemists at ADOX are coming up with new products and maintaining the
diversity of their lineup, no longer sold under the Efke label.
In the past two centuries, analog photography has brought forth
great scientific, cultural and industrial achievements.
A major artform was born which is incompletely embodied by its digital counterpart.
Even putting artistic considerations aside, the resolution obtained from
large analog negatives still
surpasses by far that of our best digital sensors.
Our sharpest images are analog ones. Long live film!
(2015-08-07) Why Silver ?
A few properties make silver uniquely suited for photography.
Many photographic processes have been developed which do not use
silver at all. In fact, we argue in the next section that
photosensitivity is a very common property of a substance;
almost an unavoidable one.
Yet silver reigns supreme at the heart of film photography.
Photographic images can be made without silver but snapshots can't.
What makes silver so special?
Well, several properties of silver turned out to be critical:
Monovalence.
The existence of insoluble halide crystals (e.g. silver bromide).
Also important is the existence of at least one soluble silver salt
(namely silver nitrate) from which calibrated insoluble silver
crystals can be precipitated.
Silver is not a very special metal in that respect,
since all nitrates are soluble.
However, the fact that nitric acid can oxidize silver
makes that soluble salt easy to obtain
(it's not the case for gold, for example).
The ionization
energy of silver is 7.5762 eV,
which corresponds to a frequency of 1831.9 THz or a wavelength
of 163.65 nm. UV light can ionize metallic silver
(photoelectric effect) but visible light cannot.
(2015-08-01) The Great Mystery of the Latent Image
The continuous road from slow to fast photo-chemistry.
Virtually any chemical compound can react to light.
Light sensitivity is the rule rather than the exception.
As a photon of sufficient energy impacts an atom,
it's able to overcome its binding energy and dislodge it from a molecule or from a crystal.
It's a common observation that most dyes will fade faster in direct sunlight than in the shade.
Almost by definition, fading is slow. The first challenge of the photography
pioneers was to identify substances that would fade fast...
Little did they know that the speed of fading is only a symptom of something
entirely different, which we have already mentioned:
The fact that light only exists in discrete bundle of energy call photons
(Einstein discovered them by properly
analyzing the photo-electric effect in 1905
and was awarded the Nobel prize for that, in 1921).
A red photon has less energy than than a blue photon and a blue photon
has less energy than a UV photon.
Some dyes that would last forever when exposed to copious amount of red light
would fade fairly quickly when exposed to UV.
The real challenge was thus to find substances that could react at all to low-energy
visible photons, although nobody phrased it in those terms at the time.
What everybody would eventually notice is that it was easier to manufacture
orthochromatic stuff (sensitive to any visible light except red)
than panchromatic stuff (sensitive to red also).
The second challenge was to fix the image obtained by the
direct action of light.
Fixing is the process of making the image permanent and ensuring that no part of it
retains any sensitivity to light.
A third challenge was to enhance as much as possible the image formed by light.
That chemical enhancement would allow pictures to be taken with shorter and shorter
exposure times until a miracle happened: The captured image was no longer
visible at all
(by that time in history trying to view the effect of a previous
exposure on panchromatic films was no longer practical anyway, because any additional
light would ruin it).
So was born the great mystery of photography, which nobody understood for
several decades:
When a picture is taken, a latent image is formed which will
remain invisible until revealed by the chemical action
of a developer (which the French appropriately
call révélateur ).
Silver was the Magic Bullet :
Science has now explained what the
latent image is and how it can be developed:
If a small crystal of
silver bromide contains at least four
metallic silver atoms (dislodged by the action of photons)
it has enough chemical potential for the developer to reduce more
of its silver ions to their metallic state
(thus releasing neutral bromide into the solution).
This goes on exponentially until the entire crystal has been
reduced to a visible dark grain of metallic silver,
containing billions of silver atoms.
(2015-07-07) The Magic of Light-Sensitive Photographic Emulsions
From wet plates to gelatin film. How silver captures light.
The light-sensitive components of modern photographic films are insoluble tiny crystals
of silver halide
(silver iodide, silver bromide, silver chloride and several types of silver fluoride).
Silver bromide is what's most commonly used nowadays.
With the possible exception of fluoride
(which can't be used in traditional photography because it's soluble in water) silver
is univalent in all those halides, which are given the generic chemical formula AgX.
The AgX crystals are obtained by precipitation in a gelatinized solution of soluble silver
nitrate by halides of alkali metals,
like potassium bromide or sodium chloride.
The alkali nitrates byproducts are usually washed off.
Because the crystals are isolated from each other by gelatin,
they behave as independent particles.
When a photon strikes a silver atom in an AgX crystal, it's reduced to metallic silver
and dislodged from the structure of the crystal.
The modification so induced is called a latent image.
When the film is processed chemically, the developer will
ignore the crystals which contain fewer than 4 metallic silver atoms
(because their overall chemical potential isn't sufficient to attract
the developer, so to speak).
The other crystals (which were sufficiently exposed to light)
may react chemically with the developer.
When one of them does, it's entirely reduced to metallic silver
and forms a visible dark grain.
Like any chemical reaction, the action of the developer is progressive
and its speed depends on temperature.
It's usually stopped (by an acidic stop-bath)
well before all the exposed crystals have been revealed.
The chemical process is completed by dissolving all remaining AgX crystals
(this is the role of the fixer).
There's much more to chemical photography than the above outline.
It's a fascinating subject which continues to attract gifted researchers.
The major source of inefficiency in that basic photographic process
occurs when the emulsion is exposed to light, because the effects caused by
90% of the captured photons dissipate before they have the chance to contribute
to the formation of the latent image.
In 1999, it was shown that this dissipation could be successfully
inhibited.
That could potentially increase basic photographic sensitivity by
a factor of ten or, equivalently, allow a comparable decrease in
the grain size of our best emulsions.
One of the workers involved (de Keyzer) is affiliated with
Agfa-Gevaert.
The patents filed by Agfa (US5985536)
have yet to be applied commercially.
(2015-06-23) Film processing
Price comparisons (June 2015).
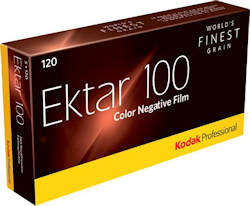
Below are quotes from several
mail-order houses for developing a single 120 roll
of color film with 16 good exposures on it
(645 format) and printing 16 standard proofs.
Only for C-41 compatible films, including Ektar 100
(shown at right).
The services offered may differ in ways which can't easily be reduced to the same denominator.
The above is just my own interpretation of different pricing structures.
They may be outdated by the time you read this.
Only Blue Moon advertises old-school analog proofs obtained as optical
enlargements of the negatives. All the others seem to use a process based on
digital scanning (whose resolution may or may not be specified).
Photoworks San Francisco will print a contact sheet for $7.00.
They offer three qualities of digital scans ($5, $7, $15).
+8.75% tax for CA residents.
The Darkroom offers optional
enhanced ($4/roll) or super scans ($9/roll)
but they don't state exactly what numerical resolution this entails (in dpi).
Richard Photo Lab offers two premium scanning options,
at $2.50 and $6.50 per roll, respectively. You can also pay
extra
($2.00) to scan with their
fashionableFrontier machine, instead of the Noritsu
(which has a faster turn-around and outclasses the Frontier for B&W).
Dwayne's handles 120 roll-film for some retail chains like Walmart.
They offer scanning to a CD, at processing time, for an additional $2.99 per roll.
They get you a set of proofs for what others charge for bare film developing.
Historically, Dwayne's was the last lab in the world to process Kodachrome
film after it was discontinued by Kodak in 2009.
(They processed the very last roll on January 11, 2011.)
Pro Image Photo offers your choice of a CD or a second set of prints at
no extra charge (the latter is a terrific deal).
You can also opt for larger prints at processing time
R6 (6" width) or R8 (8" width)
for $0.99 or $1.99 per print, respectively.
Because they void the S&H charge for orders above $20,
you can get two sets of sixteen 6" by 8" for $22.79
($21.80 for 15 images, $20.81 for 14 and, probably, $20 for 10-13).
One of the best deals around.
(2015-06-25) "Develop and Scan" Services.
Some photofinishers require this step ahead of any other service.
Once your pictures are in digital form, you can have them turn
the data files you select, at the time of your choice, into
the pictures of the size and gloss you want, with or without borders.
You can also do your own editing, retouching and reframing at no extra cost,
before spending money only on the final printings of your favorite shots.
That sounds great until you take a look at the fine details (literally)...
Although the "enhanced scans" from North Coast Photographic Services (4824 by 3533)
were praised by Ken Rockwell in 2008),
the downside of that process is that you get the same resolution from
small-format and medium-format negatives
(you get slightly better resolution directly from a good small-format DSLR).
If that were the entire story, there would be little or no point shooting medium-format film
in the digital era. However, you can go beyond that artificial limitation by
scanning film yourself, as explained next.
(2015-06-23) Scanning 120-film yourself at 9600 dpi
(= dots per inch ).
Large ultrafine-grain film negatives outperform the best digital sensors.
Even when they offer enhanced scanning,
photofinishers will typically adjust their resolution to the size of the negative,
so that the longest side is no more than 5000 pixels or so.
This matches the resolution of a small-format digital cameras but
defeats the purpose of using larger formats to capture finer details.
Ultimately, if you want medium-format negatives digitized to their full potential,
you have to do it yourself.
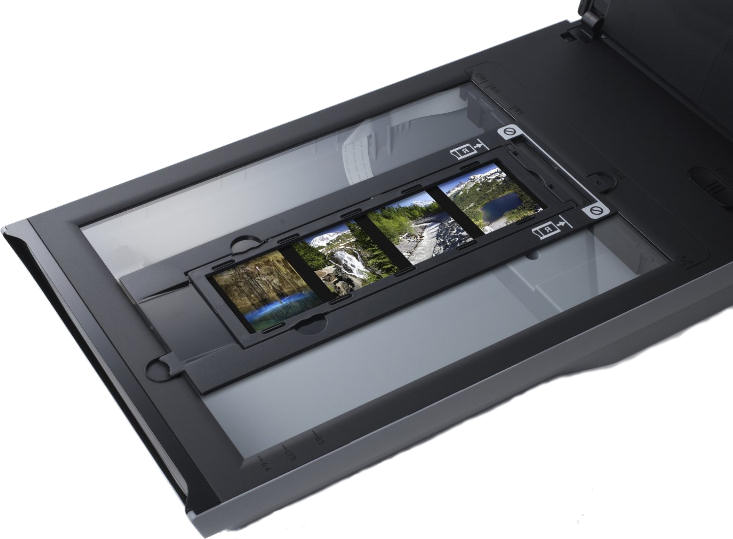
For a street price of $170, the
CanoScan
9000 F Mark II
is able to scan 120 film at 9600 dpi,
both horizontally and vertically.
Interpolated resolution is
19200 dpi
This flatbed scanner comes with a lightbox in the lid and
two dedicated film-holders (for 35 mm and 120 film).
Other negatives can also be scanned directly
(strip by strip if wider than 3¼'' ).
The optical resolution of 9600 dpi
for backlit film is equivalent to a square pixel of
2.65 microns...
Thus, the entire surface area of a 645 frame (2352 mm2 )
can be equivalent to a 336 megapixelsensor when the above scanner is used with ultra-fine grain film
(e.g., Adox CMS II ISO 20, developed in
Adotech CMS II,
released in July 2014).
Yet, that's only half the resolution
claimed by ADOX for their best film
(800 l/mm = 20000 dpi) which is roughly the diffraction limit of a perfect lens at f/2.
Only excellent optics can take advantage of such high resolutions.
Even a perfect lens won't achieve a better angular resolution than the "diffraction limit"
of 1.220 l/D
where l is the wavelength of light (555 nm
for the most visible light)
and D is the diameter of the iris (equal to f/A,
the focal length divided by the aperture number).
At infinity focus, the angular resolution at the center of the frame is
equal to the linear resolution divided by the focal length.
Thus, the linear resolution depends only on the aperture number, not the focal length.
Resolution is often quoted as the reciprocal of the linear resolution
(dots per inch instead of inches or lines per mm instead of mm):
Diffraction limit of the resolution of a lens at aperture A
(for 555 nm light)
unit
A
1.4
2
2.8
4
5.6
8
11
16
22
32
dpi
37523 / A
26533
18762
13266
9381
6633
4690
3317
2345
1658
1173
l/mm
1477 / A
1045
739
522
369
261
185
131
92
65
46
Of course, top-resolution scanning is quite slow
(fast high-resolution drum scanners
cost thousands of dollars) and produces large datafiles.
Opaque documents up to 8.5" by 11.7" (297 mm)
can be scanned at 4800 dpi.
To put it bluntly, scanning a 645 negative at 2000 dpi doesn't make it sharper than
a good small-format DSLR.
At an optical resolution of 9600 dpi,
the superiority of medium format shines through
in demanding images, like class photos or detailed landscapes
(use a tripod, sharp lens and fine film).
(2015-07-05) Infrared B&W Film Photography
The only true IR film still on the market is Rollei Infrared 400.
Early photographic films were typically orthochromatic, which is
to say that they had reduced sensitivity at the red end of the visible spectrum.
It takes some special chemistry to make a film sensitive to red
(a film equally sensitive to all parts of the visible spectrum is called
panchromatic).
It's even more challenging to make emulsions acquire at least some sensitivity
in part of the infrared spectrum.
Ilford's SFX-200 has a peak sensitivity at the very beginning of the infrared range (720 nm).
Likewise, Agfa's Retro films extend only to 770 nm.
I think such films are best used with a brown longpass filter (I use 680 nm).
Rollei Infrared is the last infrared film on the market!
It's identical to the Agfa Aviphot Pan 400s, formerly used in aerial surveillance.
This is a panchromatic film with an extended infrared response (up to 820 nm).
With a proper 720 nm IR filter,
it's best exposed around ISO 4
(ISO 6 in the Summer, ISO 2 in the Winter) and processed slightly more than the recommended
developing time...
That Rollei IR film has exactly the same formulation as the discontinued
Efke IR820 Infrared
and the related
Efke IR820 Aura
which allowed legendary artistic effects because of its lack of an anti-halation layer.
Like all Fotokemika products,
the Efke films were discontinued in the Summer of 2012.
Now that the manufacturing has moved out of Croatia, Efke technology is reverting back
to its German origin, under the ADOX trademark,
but infrared films have been left out.
"Due to declining demand", Kodak stopped the manufacture of the famous
High-Speed
Infrared Film (HIE) in 2007.
HIE was sensitive up to 900 nm.
Processing Infra-Red Film :
Although the chemical process is the same,
most labs won't accept infrared 120-films for processing.
There are two possible reasons for that.
One is essential in industrial handling,
the other is incidental in manual handling:
Quality control and mending are done inside industrial machines
using infrared cameras and lighting which could ruin infrared-sensitive film.
IR emulsions are normally laid on a very flimsy archival polyester base
(incidentally engineered to have a life expectancy (LE) of 500 years or more).
Such films are not rigid enough to be loaded in the usual way onto
Paterson reels, for artisanal processing.
I don't how anybody else deals with the latter issue but my own method is to use an ordinary
clear roll of film (bathed in a fixer without having ever been developed)
strictly for mechanical support:
I put the clear film on the back of the exposed IR film and treat that sandwich as a thick roll
of film which is loaded and processed in the usual way (possibly allowing a longer
stay and vigorous agitation in the stop-bath, to prevent corruption of the fixer by
the solution trapped between the two films). I then wash the IR film by itself,
unrolled in a bucket of water... (The clear film is also washed,
dried and stored in a safe place to be reused over and over again for the same purpose.)
(2015-06-30) Developing Black & White Negatives at Home
B&W films are easy to process yourself (arguably, easier than cooking).
Nowadays, most commercial labs concentrate on color processing.
For business reasons, fake B&W films are now sold which
must be processed with the standard treatment normally reserved
for color negatives (C-41).
One example is Ilford's
XP2.
(I find this evolution rather repugnant.)
B&W film processing is extremely easy to do as well or better than
any professional lab ever will (the same isn't true of color processing).
The only part of the process which must take place in complete
darkness is the loading of the film onto the processing reels
of a developing tank.
I dislike changing bags
and prefer the comfort of a pitch-dark closet, preferably at night.
To test your own "facility", make sure you can't detect any light
with dark-accustomed eyes (it takes a few minutes).
All the problems so revealed must be addressed ahead of time.
The worst culprit is usually the floor-clearance under the closet door,
which can be blocked by jamming a towel into it.
Additional safety is obtained by working relatively quickly with your back to the door.
For 35 mm film, don't bother opening the cartridge:
Instead, pull a little bit of the film out of the cartridge and first cut
it square between two perforations (do this in broad daylight).
In total darkness, you can pull out a few inches of film at a time and
use the weight of the cartridge to provide a gentle tug which makes
for trouble-free loading onto a Paterson spool.
When you can no longer pull any film out, just cut it off
and complete the loading of the loose tail
(put scissors in your pocket, ahead of time).
The only photo-dedicated equipment needed to process roll-film is:
Tank and reels (I recommend Paterson's System 4, or compatible).
A changing bag (unless a very dark closet can be used at night).
Scissors and/or can opener (for 35 mm cartridges only, see above).
A stopwatch or a timer (mostly to measure time in developer bath).
A thermometer (proper developing time depends on temperature).
A graduated beaker and agitator, for mixing chemicals.
A funnel, for pouring the reusables back from the processing tank.
One concertina bottle (to safely store developer, if not one-shot).
Two other storage bottles (for stop-bath and fixer).
Film squeegee wiper (use only on wet film; always pre-moisten it).
Single-use KimWipes
(sprayed with diluted photo-flo) are safer.
Film-clip pairs for drying (one hanger and one weight per pair).
For 120 film get #3 nickel-plated Bulldog clips
(#2 is slightly too small) for less than $1 a piece.
The chemicals needed are, in order of use:
Water : Optional pre-rinse (same temperature as the developer).
I recommend skipping that first step. So does Ilford.
Developer : (adjust time and/or temperature to achieve proper
ISO)
Stop bath (30 s to 2 min). Diluted acetic acid or citric acid.
Fixer : Mostly a sodium hyposulfite solution
("hypo").
Hypo-Eliminator :
In a pinch, use a 2% solution of sodium sulfite.
Running water : From the faucet, through the force film washer.
Wetting agent (30 s or more): For spot-free drying (dil. 1+199).
(2015-06-30) Paterson System 4 (or Super System 4 )
The dominant system of developing tanks and self-loading reels.
In the past 45 years, I have only used Paterson's
"System 4" equipment, which is wonderfully convenient.
There are no practical differences between my vintage system and
the newer "Super System 4" which I also use.
In the new design, the lightproofing funnel is fully contained within an
outer enclosure consisting of only two parts:
A red-rimmed vessel and a large soft black lid,
which is force-fitted onto the rim (you don't even
need the lid if you are satisfied with the built-in agitator and
don't use reversal agitation during processing).
All the surfaces are now readily accessible.
The reels, the central cylinder and the agitator rod are identical in both systems,
which are equally lightproof.
The new parts are simpler but more bulky.
The old lightproofing funnel was built into a double-walled
top part with a small grey lid.
This screwed on top of the main vessel,
using a grey gasket which has no counterpart in the new design.
Also, in the old design, the funnel was attached to the rest of the
upper part by three smallish plastic tabs which made the whole thing fragile
(I had to glue back those two pieces on my first tank).
I've never lost a 35 mm roll or ruined a single frame
(except to scratching by a bad squeegee).
I don't wish to acquire the skills needed to use
traditional stainless-steel spirals and tanks
(including the top-rated Hewes brand).
Other vendors are now making Paterson-compatible components which are worth
considering, including self-winding reels with larger take-up
guide flanges, which seem better suited to 120 roll-film:
Kaiser 4298 self-winding reel.
AP.
Jessops.
The centerpiece of Paterson's (Super) System 4
is a light-proof tank made from high-quality shiny black plastic impervious
to photographic chemicals. Different sizes
are available, according to the maximum number of films you intend
to process at once. (#114 doesn't accommodate 120 film at all.)
The Paterson reels feature a clever ratchet system (involving twin
stainless-steel balls) which doesn't require any skills:
Just engage the film and the reel will swallow it effortlessly as you
rotate its two halves back and forth.
Paterson reels (there's only one model) can be adjusted to one of three
film widths. To do so, rotate the two halves very firmly
clockwise until they disengage. Then you adjust the width
to the proper click stop and turn counterclockwise
(which will be much easier).
The first time you do this, you'll think you are going to break something;
don't worry, you won't (get help if you have troubles opening jars).
After they've been disassembled a few time, the reels become looser and this
operation is easier to do. That's good because disassembling the reel is
the best way to remove a film from it after processing.
It's also a good practice to leave the reels disassembled to let them dry thoroughly
(loading film onto a wet reel is asking for trouble).
The (measured) outer widths of adjusted Paterson reels are precisely:
This data can be useful to compute the height of a stack of reels in a
large tank (not including the 3.4 mm flange at the bottom of the axis).
This tells you, before purchase, if a given tank will be
able to process the batches of films you have in mind.
For example, with their combined processing height of 84.6 mm,
two 35 mm films fit in a Universal tank (85 mm axis).
Of course, that's what this tank was mostly designed for
(with the added bonus that you have plenty of room to process a single reel of
120 or 220 film).
That particular combination was also the reason why I stored my
processing solutions in bottles of 600 mL
for many years (before I learned about
concertina bottles).
It's also the reason why such bottles were in stock at my local
photo store (yes, there was such a thing not too long ago).
The above nominal values for the recommended volume of processing fluid
are embossed at the bottom of Paterson tanks.
To compute such volumes more precisely, the following data is needed:
The inner diameter of Super System 4
Paterson tanks is 98 mm (the outer diameter
of the reels is 93.6 mm).
To obtain the effective cross-section of the tank, deduct from the
surface area of that circle
the ring occupied by the center column
(outer diameter 25.6 mm,
inner diameter 22.2 mm).
In square centimeters, this amounts to:
S = ( 9.802
- 2.562
+ 2.222 ) p / 4
= 74.15 cm2
The volume occupied by a reel (at any width setting) is
slightly more than 40 ml.
The film you put on a reel (either a
35 mm roll or a 120 roll) occupies a volume of about
6 mL (assuming 0.14 mm thickness).
All told, the volume of the fluid needed to immerse an entire
processing reel is:
For 135, 4.23 (74.15) - 46 = 268 mL (vs. 290 mL).
For 127, 5.34 (74.15) - 46 = 350 mL (vs. 370 mL).
For 120, 6.90 (74.15) - 46 = 466 mL (vs. 500 mL).
To the above per-reel quantities we should add the
30 mL or so which are needed to immerse the flange at the bottom of the tank.
The manufacturer's simplified recommendations are sufficient to cover that,
except in the case of a single 135 or 127 reel,
where that would be a little bit too short (by about 10 mL).
Don't be too stingy when you process a single reel!
If you must, you can load two 120 rolls on a single reel
by pushing the first one gently with a specially-cut piece of cardboard
(if you have to ask how this is done, you probably shouldn't do it).
This way, you can load up to six 120-films into a single "Multi-reel 7"
Paterson tank, or 10 films with a "Multi-reel 8"
(345 mm axis, 424 mm total height.)
(2015-06-30) Developer
The developer turns a latent image
into actual metallic silver grains.
Most people use commercial developers:
Agfa Rodinal = R09 One Shot = Adox Rodinal = Adonal (5ml/film)
The oldest developer still in use (1891). Shelf-life > 40 years.
The developer bath is, by far, the most critical part of film processing.
Unlike photographic prints, negative films are almost never allowed to develop to full
or near "completion". Instead, best performance is obtained by interrupting
the process with an acidic stop-bath (see next)
at the exact time recommended by the manufacturer for a given temperature.
The key to successful processing is a precise monitoring of the time spent
in the developer bath, according to
the effective concentration (which may depend
on the total surface area of the film already processed in it).
The pre-rinse (if any) and the stop-bath
should always be at roughly the same temperature as the developer.
The film nominal sensitivity is achieved only for the recommended time
(some photographers call that box sensitivity because
it's always prominently printed on box packaging).
Routinely, most films can be developed this way, using any
developer by following the standard instructions provided by the developer's manufacturer.
Within limits, a roll can be exposed differently if you expect to "pull" or "push"
its development time. This practice influences contrast and grain too.
For optimal results, consider matching the developer to your specific film
(something professional labs rarely do, if ever).
Increasing both the ISO and the developing time of a film is called "pushing".
The less-common opposite practice is called "pulling".
It's straightforward if you do it yourself, but it's a major source of headaches
if you have to tell somebody else to do it for you.
Standard developing time are normally given for a temperature of
20°C/68°F. Correction factors are available
for temperatures between 18°C and 22°C.
Most manufacturers do not recommend experimenting outside that range.
To assure a uniform finish, manufacturers don't advocate a pre-rinse
at all (except, possibly, with de-gassed water at the same temperature
as the developer and agitated with the same care).
Agitate continuously for the first minute of development and
five seconds every minute after that...
Once the developing time has elapsed, pour the developer quickly out
of the tank and pour in the stop-bath immediately.
(2015-06-30) Stop-Bath
The proper way to end the action of the
developer is a diluted acid.
An acidic stop-bath (e.g,
1% to 2% acetic acid) is best for precise control
but some people are content with plain water, which merely slows down
the developing greatly by diluting the developer.
A proper acidic stop-bath is recommended (it's cheap)
because it renders the film light-insensitive immediately and spares the fixer.
A fresh acidic stop-bath does its job almost instantly (less than
15 seconds). I recommend soaking the film in an acidic stop-bath between
30 seconds and two minutes, but it's not critical.
To properly re-use stop-bath, check its acidity either
by smell or with a color indicator.
The stop-bath concentrates sold by
Kodak or Ilford consist, respectively, of acetic acid or citric acid
with an indicator dye
already mixed in (they're both primarily intended for tray-processing
of photographic prints but they're also usable for film).
If you ever must substitute a clear-water rinse for a proper acidic stop-bath,
at least make sure to avoid temperature shocks.
The folkloric "spoonful of vinegar" in such a rinse is all but useless.
Be serious; you need a glassful!
Example:
Kodak indicator stop bath
(dil. 1+63) is 85% to 90% acetic acid.
Kodak's solution is nice for prints, since the
indicator becomes visibly dark under
safelight
when the bath is exhausted. To make your own acetic
stop-bath, you may mix one part
white vinegar (6%) with 2 to 5 parts water.
Ilfostop
(dil. 1+19) is based on citric acid,
which gives it a low smell.
Ilford's stop-bath can be re-used many times, until the mixed-in yellow indicator
turns purple (it's probably
bromocresol purple).
A citric stop-bath shouldn't be used in combination with a hardening fixer
(the alum in such a fixer might precipitate).
The citric acid sold as a powder in food stores may contain up to 2% of silicon dioxide
(a glorified name for sand) as an anti-caking agent.
I measured 1% in Ball ®.
Cloudiness indicates the presence of that junk and the need
for a good filtering before photographic use (at least for negatives).
I recommend preparing a (filtered) storage solution of citric acid
at 1.0 M concentration
(nominally 210.139 g/L or roughly
212 g/L to allow for the anti-caking waste).
To make 1 L
of working stop-bath solution, use
70 mL to 100 mL of that concentrate.
(Again, citric acid is incompatible with hardening fixers.)
Designer Stop-Bath :
Sprint Block is a
vanilla-scented buffered stop-bath (dil. 1+9).
(2015-06-30)
Fixing images by dissolving unused silver halide.
In 1819, John Hershel
discovered that hypo dissolves silver bromide.
Commercial brands of fixers include
Ilford,
Kodak and
Kodafix (with hardener).
Don't use a citric stop-bath before a hardening fixer like Kodafix.
The fixing time should be at least twice the time it takes for the film to
appear clear. The fixer
dissolves all the milky silver bromide
left by the chemical developer on the underexposed parts of the negative.
Two ways:
It was
John Hershel
(1792-1871) who discovered, in 1819, that what he called
"hyposulfite of soda" is a solvent of silver halides.
This is still known as "hypo" among photographers.
The learned name is
sodium thiosulfate.
This substance forms pentahydrated crystals
(Na2S2O3, 5H2O)
at 248.185 g/mol, commonly sold as
"hypo penta" or prismatic rice.
When in doubt, leave your film in hypo for a few more minutes.
However, do not prolong this precaution needlessly,
as this makes the film more difficult to wash.
Some modern fixers (e.g., Ilford Rapid Fixer ) use
ammonium
thiosulfate (NH4)2 S2O3
which works about four times faster than hypo (1 or 2 min.).
To get the most from your fixer, check the film after two or three minutes of
fixing (film is no longer light-sensitive at this stage).
If there's still some white residue on it, keep fixing and check back later.
Once the film appears clear, put it back into the fixer again for an equal amount
of extra time.
When that total time exceeds fifteen minutes or so, the solution is nearly saturated
with silver and it's time to dispose of it
(you may confirm that fact with Edwal hypo-check).
Professionals never dump spent fixer down the drain.
Although silver isn't nearly as toxic as some other heavy metals, it's not too good
for the environment. The most mindful method is to retrieve metallic
silver by electrolysis before dumping the rest of the solution
(amateurs are under no legal obligation to do so).
The silver content of B&W emulsions is typically 4 grams
per square meter.
That's roughly 1 g
(currently worth about $0.50) in 4 rolls of 120 film,
or 5 rolls of 35 mm (36 exp.).
In properly exposed film, less than half of that silver stays on the film in metallic form.
The rest gets dissolved in the fixer.
(2015-07-07) Washing processed film.
Salty water makes the final fresh-water rinse more efficient
A salty pre-wash
(mostly sodium sulfite, usually)
is particularly useful for removing the residues of a hardening fixer,
by ion exchange.
It's not needed after an ammonium-based rapid fixer.
A dubious legend has it that early Navy photographers had noticed that they obtained a better wash
quality by using seawater before a shorter fresh-water rinse
(a precious commodity at Sea).
To mimic this, Kodak recommends a preliminary water rinse of 30 seconds
followed by 1 or 2 minutes in their
Hypo
Clearing Agent (HCA). After that, a final rinse of 5 minutes in running water
seems sufficient (otherwise, 20 to 30 minutes would be prudent).
Their HCA packages list 4 components:
The respective quantities (not given by Kodak) per liter of stock solution
(to be diluted 1+4 to make a working solution) seem to be
100 g, 25 g, 2 g, and 5 g.
The first component is essential, the second is for pH optimization, the third is a preservative.
The last component (EDTA salt)
is a sequestering agent,
similar to Calgon®,
to accommodate hard water.
Kodak no longer sells their dry mixture in small packets to make one liter of
HCA stock solution.
You can only buy the "professional" size of 500 g
(to make one gallon of stock, or 5 gallons of working solution).
Once mixed, the stock solution is good for only three months in a stopped
bottle (the working solution lasts a week in a bottle but only 24 hours in a tray).
Most amateurs won't be able to use the whole thing in 3 months and must therefore
fraction the powder. This procedure isn't recommended in critical cases
(e.g., developer) but it's perfecly acceptable for HCA.
Mix the powder thoroughly by tumbling it in a dry bottle
(the larger the better).
Shaking is not a good way to mix a powder, because of the
Brazilian
nut effect. Then, weigh the proper quantity for
the volume of stock solution you intend to make (500 g per gallon,
125 g per quart, 132 g per liter).
Ilford Washaid
is sold as a liquid concentrate (dil. 1+4) with an unspecified shelf-life.
It seems to have a composition similar to HCA.
(2015-07-07) Drying.
A wetting additive in the last rinse conditions rhe film for spotless drying.
The usual recommendation is to soak the washed film for at least 30 seconds
in a conditioning bath of diluted wetting agent (most commonly 1+199).
Edwal LFN
is so potent that the manufacturer recommends using only 2 drops for
500 mL of tap water (1 drop is enough with distilled water).
Sprint's End Run
promises to leave an anti-static coating on the film after drying, if specific instructions
are followed (i.e., wipe film with a sponge instead of a rubber squeegee).
(2015-07-04) History of natural-color reproduction:
From autochrome plates and Technicolor® to the first color films.
For motion pictures, the impression of color can be achieved by projecting successive frames in
the three additive primary colors
(a black and white film was projected through a synchronized wheel of filters.)
A British patent for this technology was issued to
Edward Raymond Turner (1873-1903)
from London, who produced the first natural-color motion picture in 1902.
Turner managed to take color footage this way
(the earliest known footage shows his children in the Summer of 1902).
However, he wasn't able to construct a satisfactory projector before he
died of a heart attack in 1903.
The historical significance of Turner's work was mostly ignored until some of his
original footage was found in 2012,
in the archives of the National Media Museum in Bradford.
Capturing every frame, the British Film Institute (BFI)
could finally show humanity's
first color motion picture
to an audience, any audience, for the very first time...
The same idea was the basis for the less ambitious two-color
Kinemacolor
system, invented in 1906 by
George
Albert Smith (1864-1959) from Brighton.
Kinemacolor had some commercial success between 1909 and 1918,
under the leadership of Charles
Urban (1867-1942).
The projectors showed successive frames alternately through red and green filters.
Blue tones were missing and color fringing was visible on moving subjects.
For still color photographs, the earliest successful system (beyond experimental work
by Maxwell and others) was based on the
Autochrome Lumière
system, patented by the
Lumière brothers
in 1903 and first marketed in 1907.
This included the process born as Dioptichrome or
Dufaycolor
(invented in 1907 by the Frenchman
Louis Dufay) and the similar
German Agfa-Farbenplatte (Agfa color plate).
Both of those begat film products primarily meant for the motion-picture industry, around 1932.
In particular, the Agfa film went under the name of
Agfacolor
before it was phased out by the introduction of the first proper
tripack Agfacolor film, in 1936.
Technicolor: Two-color in 1916, three-color in 1932.
Originally,
Technicolor System 1
was a two-color process improving upon Kinemacolor.
The main innovation was to use a beam-splitter to obtain simultaneously
two shots of every frame with different color filters.
Skilled projectionists superposed the images from separate prints to reproduce
colors additively for their audiences.
System 1 was first used
to shoot and print the film entitled The Gulf Between (1917).
The Technicolor name would be retained to denote all subsequent evolutions based
on beam-splitter cameras, which dominated Hollywood's color motion pictures
for 30 years, between 1922 and 1952. Ultimately, 3-color Technicolor
(System 4) would receive high marks for its ability to achieve high
levels of color saturation.
In 1922, the films shot by those same Technicolor cameras were
recombined into a single subtractive laminated print
containing the proper color pigments.
Such prints could be projected by unskilled projectionists using white
light.
This was called System 2.
In 1928, System 3 was introduced, which did
away with the cemented laminates and produced
single-layer prints by transferring colored dyes directly on the substrate.
This was significantly improved in 1931,
with better image quality and more vivid colors at a lesser cost.
Finally, in 1932, a full-color Technicolor camera was designed by
Technicolor founder W. Burton Wescott
(who had apparently left the Technicolor corporation in 1921) and
Oscar-winner
Joseph A. Ball (1894-1951).
The new Technicolor camera exposed simultaneously three
strips of B&W film.
The first beam from the beam-splitter went through a green filter
(blocking red and blue) to expose one strip very sharply.
The second beam went through a magenta filter (blocking green light
and letting red and blue through).
It exposed two strips of B&W film with their emulsion
sides pressed against each other. The front film, sensitive
only to blue light, had an emulsion with a thin superficial orange-red
coat. Thus, only red light reached the panchromatic film in the back.
All three-strip Technicolor cameras had expansive
movements supplied by
Mitchell
and were owned and leased by the Technicolor corporation.
The three Technicolor negatives were used to produce the color
matrices in the new System 4 providing
unsurpassed prints for distribution.
Yet, almost from the start, this system would be subjected to tough
competition brought forth by the desire for camera simplicity and the need
for a color negative that would rival the convenience of black-and-white.
The revolutionary war of color films was fought in the mid 1930's between
America (Kodak) and Germany (Agfa).
The technological Holy Grail of that period, for natural color reproduction,
went by the name of integral tripack, which described modern color
film as we know it today: a single celluloid film with three differently
color-sensitized emulsion layers.
On April 15, 1935, Eastman-Kodak officially introduced
the first such integral tripack under the name of
Kodachrome.
(That name had previously been describing the two-color process due to
John G. Capstaff (1879-1960)
which Kodak had released in 1915.)
This was the end result of years of efforts by
Leopold Godowsky
(1900-1983)
and Leopold Mannes
(1899-1964) whose early research had so impressed
Kodak's chief scientist
(C.K. Mees, 1882-1960)
that the two men were granted financial and technical support by Kodak to finish the job.
At the time, the Germans were more than one year behind in the race, but
the chemists at Agfa
came up with their own experimental version of an integral tripack
color film just in time for the Summer Olympics of Berlin
(1936).
This new Agfacolor film was first tested in the swimming competitions
(a non-tripack older Agfacolor film had been introduced in 1932 which was based on
the older French autochrome process).
It would take three years for that German technology to mature.
The turning point was the filming of the musical
Frauen sind doch bessere Diplomaten
(Women make better diplomats).
The producers at UFA
had to yield to the demands of the infamous Minister of Propaganda
of the Third Reich,
Joseph Goebbels (1897-1945)
who wanted that film shot on new Agfacolor...
That transformed the shooting into a series of trial-and-error tests
with a few dismal failures (yellow grass and such)
but a near-perfect end result (1941).
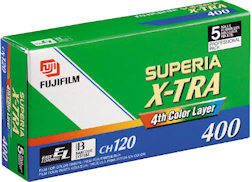
Highlighted in yellow are nonstandard novelty films suitable for special effecrs but not natural-color reproduction.
As the rendition of greens and violets may be wanting in some fast color films,
Fuji added a fourth color layer to their Superia X-TRA 400 to
address that specific issue.
Unfortunately, the production of that innovative film has now
been discontinued, at least in the 120 format.
Fujifilm stopped producing films for the motion-picture industry
in March 2013.
(2015-07-01) C-41 Processing at Home
The standard way to process color negatives.
The original Kodacolor film (1942) used
C-22 processing.
So did its Kodacolor-X successor (1963).
Eastman-Kodak introduced the C-41 process in 1972,
as they switched (over a period of a few months)
from Kodacolor-X film to Kodacolor II, the first C-41 film.
C-41 is now the only process used for all brands of
current color negative (CN) film.
Other manufacturers use different names for equivalent processes
like CN-16 (Fuji) or AP70 (Agfa) but everybody mentions Kodak's C-41 as the
main marketing and technical reference.
Differences between chemistry suppliers are insignificant
(5% contrast, at most).
You could have more variations from one day to the next in the
same lab using the same chemistry.
Personally, I'm quite happy to leave C-41 processing to professional labs.
Nevertheless, the process can be performed at home with ordinary black-and-white
equipment. However, temperature tolerances are much tighter for color than for B&W
and you can't simply adjust developing time to a casually-measured temperature.
With color films, such adjustments could adversely influence color-balance...
The developing temperature must
be just whatever the manufacturer specifies, as precisely as possible.
The use of a controlled water-bath for the developing tank and critical
storage containers is almost mandatory.
Some of the chemicals involved are nasty. Glove protection is a must.
Unlike B&W, there's no room for creativity in C-41 processing.
Just follow carefully the instructions that come with any C-41 chemistry kit :
(2015-07-04) Positive color films. Color slides.
Kodachrome and K-14.
Ektachrome, Fujichrome and the E-6 process.
The advantage of reversal color-film is to bypass the need for proof prints.
A professional photographer can examine all aspects of the picture in positive
form, including color balance, directly from the film
(possibly with the help of a magnifier).
Color prints of superior quality could be produced from positive film
as easily as they can be obtained from negatives, using
Cibachrome/Ilfochrome Classic
(which was discontinued in 2012).
For consumers, processing labs typically produced slides
by mounting each frame of a positive film in a square of cardboard suitable for projection
in family circles or elsewhere.
Slide projectors became very popular in education and conference circuits.
For intensive use of some slides, the cardboard was discarded and
the film mounted in a plastic equivalent between two thin windows of glass.
This helped minimize deformations of the celluloid under the intense heat
from the projector...
In the early days of color slides, the price of reversal film included processing
(a mailer was included in the box to send in your exposed film).
Such process-paid sales were ruled to be illegal in the United States in 1954,
but the practice was not discontinued in the rest of the world...
Back in France, I was mailing my beloved Kodachrome rolls
(ASA-64 and 25 sensitivities only)
to Kodak-Pathé,
avenue Victor Hugo, 93-Sevran,
where up to 2100 people (75% of them women) were working day and night to process
the pictorial memories of an entire nation.
With the advent of digital photography, that legendary site would just become an
infamous wasteland (la friche Kodak).
Kodachrome films
(Kodachrome 25 and Kodachrome 64)
were processed in a specific way
(K-14)
which was only meant to be carried out by a few specialized professional labs,
with chemistry supplied by Kodak.
K-14 (lastly K-14M) evolved from the Kodachrome
process introduced in 1935.
The production of both Kodachrome films and Kodachrome chemistry
was discontinued by Kodak in 2009.
The last lab to operate a Kodachrome line was
Dwayne's Photo, which stopped accepting
Kodachrome film at YE 2010 and processed its last Kodachrome roll on
January 18, 2011.
Since the demise of Kodachrome,
the only surviving process for color slides is the simpler
E-6 process
which evolved from the original process (E-1)
introduced for Kodak's Ektachrome in 1946.
E-6 has also been widely used to process Fujichrome
(Velvia-50,
Velvia-100,
Provia-100,
Provia-400X).
Agfa's equivalent, dubbed
Process 44,
is intended for their own lineup of reversal films:
Agfachrome 64S, 100 or 200.
Professional labs use a six-bath version of the E-6 process.
By combining the reversal bath with the color developer and
the bleach with the fixer, a compatible "three-bath" version
(plus stabilizing bath) has been devised as chemistry kits
for individuals who use traditional
[Paterson] black-and-white equipment
(albeit in a water-bath with stricter temperature controls
than for C-41).
That process was once also known as E-7 but this has been
abandoned for marketing reasons
(calling is "three-bath E-6", or simply E-6, better reflects the key selling
point that the process works with all films labeled E-6).
The four baths in the
three-bath E-6 kit [sic]
are (assuming 500 mL tank).
First (B&W) Developer (FD). 37.5°C - 38.0°C.
100 mL of FD concentrate and 400 mL of water.
Reversal & Color Developer (CD). 37.2°C - 38.3°C.
100 mL of CD-1, 60 mL of CD-2, 340 mL of water.
Bleach & Fixer (Blix, BX). 33.3°C - 38.9°C.
100 mL of BX-1, 100 mL of BX-2, 300 mL of water.
Stabilizer & wetting agent (STAB). 20°C - 25°C. One minute.
50 mL of STAB concentrate and 450 mL of water.
The timing of the first three baths depends critically on the number
of films which have been processed or are being processed in them.
The range and precision of temperature measurements are compatible
with medical thermometers but most of those
aren't well suited to photographic purposes for two reasons:
They usually take too much time to reach equilibrium.
They record only the top temperature reached between resets.
Some equipment is available for individual professional photographers
with serious processing needs, mostly in the field of large-format photography.
In a video tutorialTony Santo explains how to reliably execute the full six-bath E-6 process
with the help of mechanized Jobo gear
(Jobo drums are not compatible with Paterson tanks). This isn't for everyone.
Below is a list of some currently available color reversal films, or recently discontinued ones.
With the notable exception of discontinued Kodachrome,
all of them are compatible with E-6 processing.
Prices are for one 120-roll of film (shown in italics if part of a multi-pack).
Highlighted in yellow are nonstandard novelty films suitable for special effecrs but not natural-color reproduction.
As of March 2012, Kodak discontinued the production of all forms
of color-reversal film (CR).
A few ektachrome rolls remained on sale because they were refrigerated
to prolong their useful life. Then, in January 2017, Kodak
announced that it would resume production of Ektachrome film in the Fall of 2017.
A full-scale re-launch is expected for 2018, in 35 mm and Super 8 formats.

(c) 2015 - Gerard P. Michon")
 (2015-06-23) Film processing
 (2015-07-04) Black-and-white film.